If you have been planning an ambitious project around the garden which shall require many post holes, then a power auger shall be your saving grace. A Post Hole Auger will help you put in precise holes quickly. Also, a Post Hole Auger will help prevent you from breaking your back through tough terrain. This article will help you learn how to use a Post Hole Auger safely. But first, here are some of the benefits of a Power Auger.
Benefits of a Post Hole Auger
- Save concrete wastage by creating the right size hole
- Helps prevent surrounding soil disturbance, so your post will set nice and rigid in the ground.
- You can change the size of the auger bit to accommodate different size posts.
- Easy to use and operate
- Able to drill through sand, soil, soft to medium dirt with light to moderate conglomerate rocky texture
- Easy to transport
Safety First
It is important to remember when you use any power tool to ensure you have safety gear to protect you from injury. We recommend when you use a post hole auger that you should wear:
- Safety goggles for eye protection
- Ear defenders for hearing protection
- Safety gloves to assist with handling the drive unit as well as prevent blisters.
- Long pants to protect against any rocks which may fling up during drilling.
How to use a post hole auger
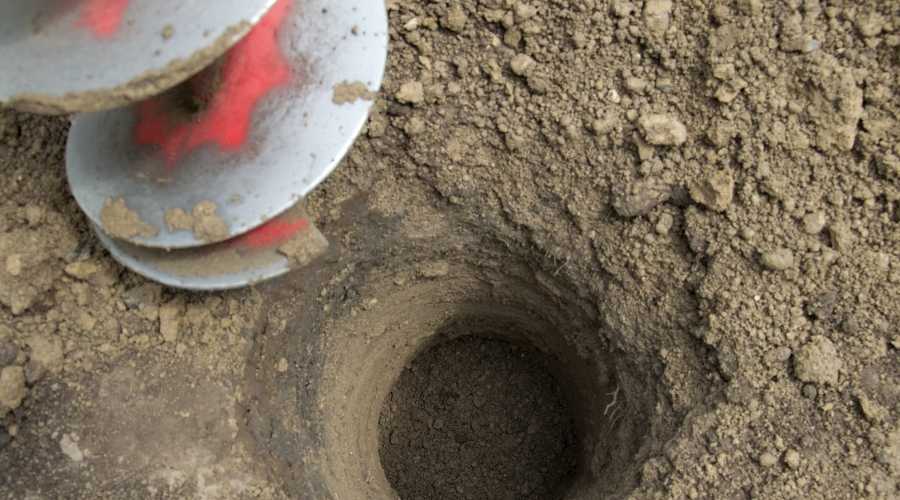
To use a post hole auger is relatively straight forward. Firstly, connect the auger attachment (generally with the spring pin). Then it is merely a matter of moving the post hole digger into position and starting the motor.
The weight of the machine, as well as gravity, will assist in getting the hole started. Most auger bits have a teeth plate on the tip of the auger drill bit. These teeth help scrape the surface to start the hole. Additionally, they help break up clay and small rocks as the auger digs down into the earth.
Use the speed on the machine to determine how fast the auger rotates. If it is a single post hole borer, for safety it is recommended to start at a slow to medium speed until you determine how hard the dirt is that you are going into. If you hit larger rocks, you may have to dig them out manually.
Step 1: Mark out the location of holes
If you are putting in a fence, posts or shrubs in a straight line, use a string line and measure the distance between each post hole or shrub location.
Step 2: Choose the right auger size
Post Hole Drilling
Here are a few tricks to get the posts rigid.
- Select the right depth of the hole. A post should go into the ground 1/3 of the post height required above the ground. For example, if your fence is 1.2 metres above the ground, then you should be aiming for a minimum of 40cm into the ground. Also, you should drill your hole a little bit deeper to allow for the concrete to fill under the post. Doing this helps prevent timber rot.
- Select the right width of the hole. A post hole should be three times the width of the post. So if you are putting in a 100mm round or square post, the hole should be 300mm in diameter or approx 12″.
- Once you have secured the post in position with some prop beams, pour your concrete and adjust if required while the concrete is wet. To get the best results, always use a spirit level or post level.
- The biggest benefit other than breaking your back with a shovel is the sides of your hole will be firm and stable. Therefore, once the concrete sets, you will have little to no movement.
Drilling holes for plants and shrubs
A post hole auger makes light work when putting in many shrubs or lining up holes for a hedge. For plants to successfully take root; however, you should use an auger size as outlined below:
- 100mm pot – 200mm hole
- 200mm pot – 400mm hole.
It is important not to drill too deep to plant as the soil will compact down, and the plant will sink. We recommend drilling down approx 150mm below the pot depth. So if your pot is 200mm, then the hole should be no more than 350mm in depth.
Once you have drilled the hole, unlike when you drill a hole for a post, you should loosen the sides of the hole with a crowbar. Following this advice allows soft roots to penetrate the sides of the hole when they grow to it. If you do not do this and the ground is too hard, it will stunt the growth of the plant. After loosening the soil, remove excess dirt from the hole, fill the bottom with garden soil, position your plant and fill around the sides to the top. If you are looking at doing a fence around your garden, it would be much cheaper for you to hire a single person machine.
However, if your business is landscaping or fencing, a post hole digger will be a godsend. Over the life of the machine, it will save not only your back but also so much time.
Create holes in little to no time at all for:
- Fencing posts
- Retaining wall posts
- Decking posts
- Shrubs and plants
- Small trees
And much more. If you like this article, share it on Facebook with your friends. Here are some handy links for you to explore our range of Post Hole diggers and Auger attachments.
- Lumag EB400 PRO Two Man Petrol Post Hole Borer / Auger
- Lumag EB520G One Man Post Hole Borer & Auger Set
If you are after something else, contact us and we shall try to assist you with your needs.